Prep Time: 20 minutes Cook Time: 15 minutes Total Time: 35 minutes Serves: 8

Introduction
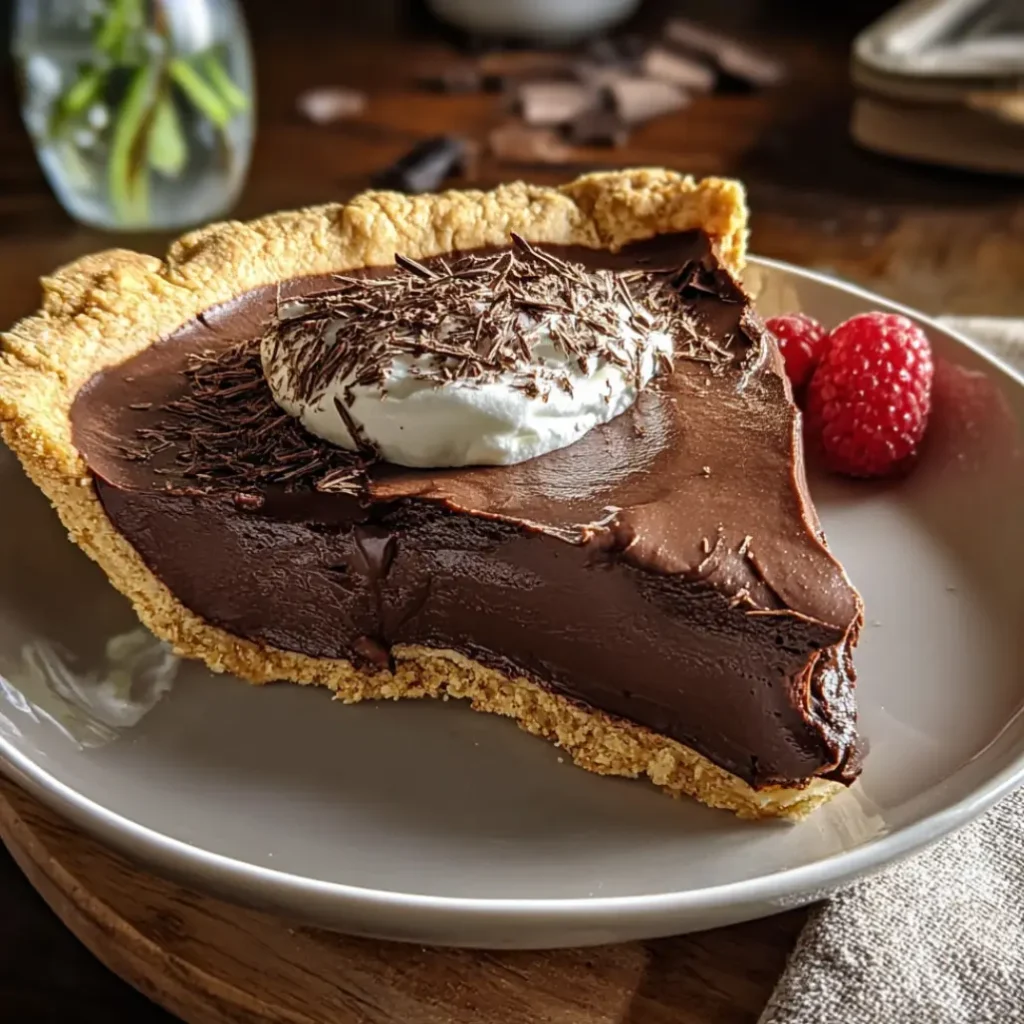
Grandma’s chocolate pie is one of those desserts that feels like a warm hug because every bite carries the comforting richness of homemade chocolate custard layered inside a buttery crust and finished with a cloud of whipped cream. This pie has that nostalgic quality only old-fashioned recipes possess, reminding you of family kitchens, handwritten recipe cards tucked into drawers, and the smell of chocolate simmering gently on the stove. Making grandma’s chocolate pie is more than preparing dessert—it’s reviving a tradition, a memory, and the joy of slow, simple cooking that never goes out of style.
Why Grandma’s Chocolate Pie Has Timeless Appeal
This beloved dessert stands out because it blends deep chocolate flavor with a smooth, silky texture created through careful stovetop cooking. The custard is rich without being heavy, sweet without overpowering, and balanced by the airy whipped cream topping that melts softly over the cool pie. People cherish grandma’s chocolate pie not just for the flavor but for the emotions attached—celebrations, Sunday dinners, and gatherings where this pie appeared as the final sweet touch. It’s dependable, nostalgic, and always delicious, which is why it has been passed down through generations.
Ingredients You’ll Need
Pre-baked pie crust
Granulated sugar
Cocoa powder
All-purpose flour
Salt
Whole milk
Egg yolks
Butter
Vanilla extract
Heavy cream
Powdered sugar
The Art of Creating Grandma’s Chocolate Pie
Crafting grandma’s chocolate pie is about letting simple ingredients unfold into a silky custard because gentle heat and patient whisking bring everything together. The cocoa enriches the mixture with a deep chocolate aroma, while sugar balances the bitterness. Flour acts as a thickener, and egg yolks give the filling its signature creaminess. Once cooked, butter adds glossy richness and vanilla warms the flavor. As the pie chills, the custard sets into a smooth, sliceable filling topped with freshly whipped cream for a light, airy finish. This combination of textures—creamy custard, crisp crust, and soft topping—creates a dessert that feels classic and comforting.
Step-by-Step Instructions
Mixing the Dry Ingredients
- Combine sugar, cocoa powder, flour, and salt in a saucepan because mixing the dry ingredients first helps prevent lumps when liquids are added.
Professional Tip: Break up any cocoa clumps before adding milk.
Key Points: Smooth base equals smooth custard.
Adding the Milk
- Slowly whisk in the whole milk until the mixture is fully blended because gradual incorporation ensures even texture.
Professional Tip: Add milk in stages rather than all at once.
Key Points: Proper mixing avoids grainy filling.
Cooking the Chocolate Mixture
- Heat over medium, stirring constantly, until thickened because slow heating allows starches to activate and create a velvety consistency.
Professional Tip: Stir along the bottom and edges to prevent scorching.
Key Points: Even heat produces flawless texture.
Tempering the Eggs
- Whisk egg yolks in a separate bowl, then slowly pour in some hot mixture because tempering slowly raises the egg temperature without scrambling.
Professional Tip: Work with small amounts of hot custard for best control.
Key Points: Proper tempering ensures a rich, smooth filling.
Finishing the Custard
- Return yolk mixture to the pot and cook briefly because this final step thickens the custard fully and stabilizes it.
Professional Tip: Remove from heat as soon as thick—it will continue to firm as it cools.
Key Points: Overcooking can lead to graininess.
Adding Butter and Vanilla
- Stir in butter and vanilla because these ingredients melt into the warm custard and bring depth and richness.
Professional Tip: Add butter in small pieces so it melts evenly.
Key Points: This step enhances flavor and shine.
Filling the Crust
- Pour warm filling into a pre-baked crust because the custard spreads smoothly when warm and sets beautifully as it cools.
Professional Tip: Use a spatula to smooth the surface.
Key Points: Proper filling leads to clean, neat slices.
Cooling the Pie
- Allow the pie to cool, then refrigerate until firm because chilling gives the custard time to set into its signature silky texture.
Professional Tip: Chill uncovered for 15 minutes before covering to avoid condensation.
Key Points: Longer chilling means cleaner slices.
Adding the Whipped Cream
- Beat heavy cream with powdered sugar until soft peaks form because whipped cream adds a light, airy finish that complements the rich chocolate filling.
Professional Tip: Chill the bowl and beaters before whipping.
Key Points: Soft peaks keep the topping delicate and creamy.
Professional Tips for Perfect Results
Use whole milk for richness. Stir constantly while heating. Temper eggs slowly. Avoid high heat to prevent curdling. Chill the pie completely for best texture. Whip cream just before serving. Add extra vanilla to enhance aroma. Use a deep pie crust for generous filling.
Creative Variations
Add espresso for mocha flavor. Use dark cocoa for intense richness. Top with chocolate curls or cocoa dusting. Add toasted nuts for crunch. Use almond extract for a subtle twist. Add a layer of sliced bananas under the custard. Mix in a pinch of cinnamon for warmth.
Perfect Pairing Ideas
Serve grandma’s chocolate pie with fresh berries, vanilla ice cream, hot coffee, or cold milk because these additions enhance the rich chocolate flavor. Pair with citrus desserts for contrast. Offer alongside buttery cookies or shortbread for added texture.
Discover More Delicious Ideas
Experiment with classic custard pies. Try different flavors of whipped cream. Explore old-fashioned desserts with similar techniques. Create mini chocolate pies using tart shells. Celebrate holidays with variations using spices or seasonal toppings.
Storage Guidelines
Refrigerate leftover pie because custard requires cool temperatures to hold its structure. Cover lightly and enjoy within several days. Avoid freezing, which may cause texture to separate. Add fresh whipped cream only when serving to maintain fluffiness.
The Science Behind the Silky Custard
The custard in grandma’s chocolate pie works because flour thickens through starch gelatinization, while egg yolks add body by gently coagulating under controlled heat. Constant whisking prevents clumping and curdling. Butter enriches the mouthfeel, and cocoa solids add depth and structure. When chilled, the custard stabilizes into a sliceable form that still feels soft and creamy.
Troubleshooting Your Results
If custard becomes lumpy, whisk vigorously or strain. If too thin, cook slightly longer. If too thick, add a splash of warm milk. If whipped cream weeps, whip to slightly firmer peaks. If crust softens, blind-bake longer next time. Adjust sweetness or cocoa based on taste.
Additional Inspirations
Layer with crushed cookies. Turn into parfaits with berries. Add caramel drizzle. Use chocolate graham crust instead of traditional crust. Create mini pies for parties. Garnish with toasted coconut. Add peppermint extract for a holiday version.
Conclusion
Grandma’s chocolate pie remains a classic because it blends silky chocolate custard, buttery crust, and light whipped cream into one harmonious dessert. Every bite feels nostalgic, warm, and comforting, carrying the essence of tradition and homemade goodness. Whether served at celebrations or enjoyed quietly after dinner, grandma’s chocolate pie brings timeless sweetness and happiness to every occasion.