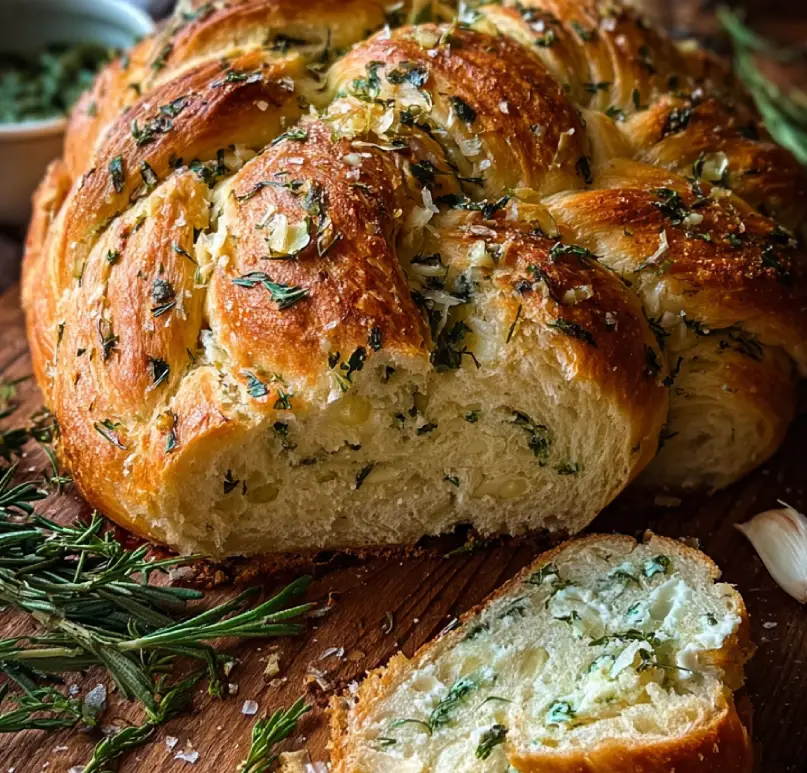
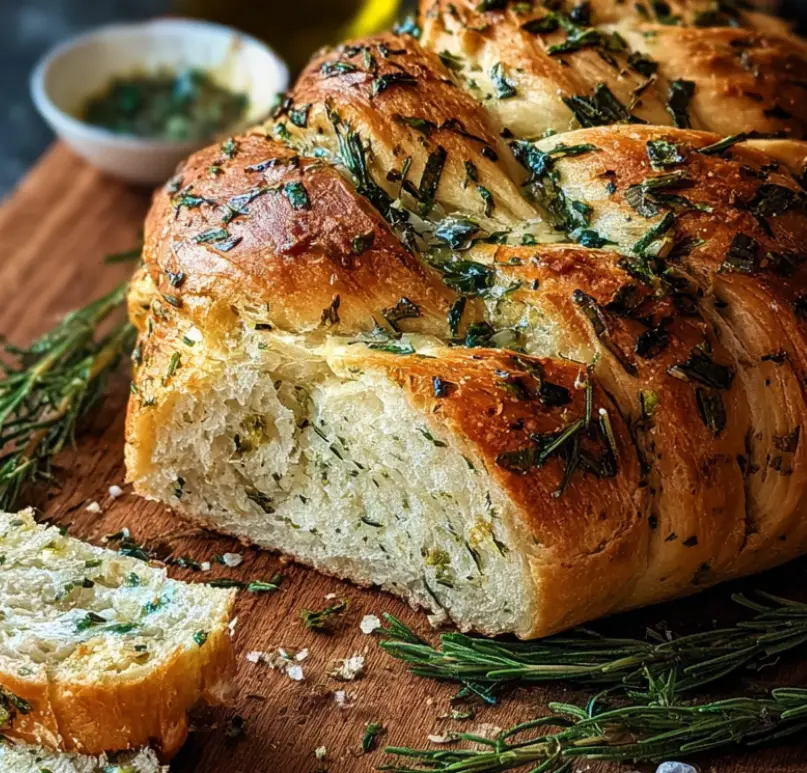
Prep Time: ~30 minutes (including proofing) Bake Time: ~25–30 minutes Total Time: ~3 hours (including rise time) Yields: 1 beautiful loaf
Introduction
Imagine pulling apart a warm loaf of braided bread, each strand threaded with garlic, fresh herbs and butter, releasing soft steam and fragrant aroma as you slice in. That’s exactly the delight of this Garlic Herb Braided Bread—a centrepiece loaf that feels special but is absolutely achievable for bakers of any level. Whether you serve it at a dinner party, alongside soup or just with butter for afternoon tea, it’s comfort and elegance in one.
Why Garlic Herb Braided Bread Is Worth Celebrating
This bread stands out because it combines visual appeal (the braid), aromatic herbs and garlic, and the satisfaction of homemade bread. It’s more than a side— it becomes something you look forward to making, slicing and sharing. Because you layer flavour into the dough and finish with a fragrant butter-herb glaze, you get richness, aroma and texture that elevate everyday bread to special-occasion status.
Ingredients
- 1 ¼ cups warm whole milk (≈110-115 °F / 43-46 °C)
- 2¼ teaspoons (1 packet) active dry yeast
- 2 tablespoons granulated sugar
- 1 teaspoon salt
- 3 tablespoons unsalted butter, melted
- 2 large eggs, room temperature
- 3½ – 4 cups all-purpose flour (plus extra for dusting)
- 2 tablespoons fresh minced garlic (or 1 tablespoon garlic powder)
- 2 tablespoons chopped fresh herbs (such as rosemary, thyme, parsley)
- For finishing: 2 tablespoons melted butter + additional chopped herbs for brushing
The Art of Creating Garlic Herb Braided Bread
The magic takes a few stages: activating yeast, making a soft dough, incorporating garlic and herbs so the flavour is well-distributed, then shaping into three (or more) strands and braiding. After proofing, you bake until golden and apply the melted butter and herb brush to finish. Because you commit to both structure (braid) and flavour (garlic/herb butter), the result is a loaf that looks bakery-level but is comforting and accessible.
Step-by-Step Instructions
Step 1: Activate Yeast & Combine Wet Ingredients
Whisk warm milk, yeast and sugar in a bowl and let sit ~5 minutes until foamy. Add melted butter and eggs, whisk until smooth.
Professional Tip: Ensure the milk is warm but not hot—over-heat will kill the yeast.
Key Points: Proper activation = reliable rise.
Step 2: Add Dry Ingredients & Knead
In a large bowl or stand mixer, combine 3½ cups flour, salt, minced garlic and chopped herbs. Stir dry mix. Gradually add the wet mixture until dough comes together. Add extra flour if dough is sticky; aim for a soft, smooth, elastic dough. Knead ~6–8 minutes by hand or ~4 minutes on medium in mixer.
Professional Tip: The dough should pass the “windowpane test” (stretch a bit—shouldn’t tear immediately) for good gluten development.
Key Points: Good texture = chewy-soft crumb.
Step 3: First Rise
Shape dough into a ball, place in a lightly-oiled bowl, cover with plastic wrap or a damp cloth, and let rise ~1 hour or until doubled.
Professional Tip: For consistent rise, place bowl in warm draft-free area.
Key Points: Rise affects texture and volume.
Step 4: Shape & Braid the Loaf
Punch down the dough, then divide into 3 equal pieces. Roll each piece into a ~12-inch rope on a lightly floured surface. Pinch ends together, then braid by crossing strands over each other. Tuck ends underneath for neat finish. Place the braided loaf on a parchment-lined baking sheet.
Professional Tip: Lightly chilling ropes for 5 minutes helps keep shape while braiding.
Key Points: Even strands = uniform bake.
Step 5: Second Rise & Pre-heat
Cover the braided loaf lightly and let it rise for ~30 minutes (dough will puff slightly). Meanwhile, pre-heat your oven to 350 °F (≈175 °C).
Professional Tip: The second rise should be noticeable but not over-proofed (which can collapse in the oven).
Key Points: Proper proofing ensures volume.
Step 6: Bake & Finish
Bake the loaf for ~25–30 minutes or until golden brown and internal temperature reaches ~190 °F (88 °C). In the last minute, brush the melted butter and additional chopped herbs over the top. Let the loaf rest ~10 minutes before slicing.
Professional Tip: If the top browns too quickly, tent loosely with foil for the last 5–10 minutes.
Key Points: Finishing touches = beautiful crust + extra flavour.
Professional Tips for Mastery
- Use very fresh yeast—check the expiration date for best rise.
- Choose fresh herbs for the best aromatic flavour; dried herbs can be too subtle.
- If you like a garlic-strong flavour, consider adding a ½ teaspoon garlic powder in addition to minced garlic.
- Let the loaf cool for at least 10 minutes before slicing to maintain structure and prevent gummy texture.
- If slicing ahead of time, toast slices lightly before serving to refresh texture.
Creative Variations
- Three-herb braid: Use rosemary, thyme and oregano for varied herb notes.
- Cheesy version: Add ½ cup shredded Parmesan or mozzarella into the dough before braiding.
- Sweet-savory twist: Add ½ teaspoon garlic and swap the herbs for finely chopped basil and top with sun-dried tomatoes.
- Gluten-free version: Use a blend with 1:1 gluten-free flour and add 1 tsp xanthan gum—expect a slightly different texture but similar flavour.
Perfect Pairing Ideas
This garlic herb braided bread pairs beautifully with soups (tomato basil, butternut squash), stews or hearty salads. It also makes an excellent base for bruschetta, open-faced sandwiches or simply served warm with herb-butter. A crisp white wine or a mild pale ale complements the herbal garlic loaf beautifully.
Storage Guidelines
Store the loaf wrapped in foil or in a plastic bag at room temperature for up to 2 days. After that, the texture begins to become denser. You can freeze slices in a sealed bag for up to 1 month; toast directly from frozen for best results.
The Science Behind the Flavor
Garlic and fresh herbs release volatile aromatic compounds when baked which infuse the bread all the way through. The braided shape allows more crust surface for flavour and visual appeal. Butter in the dough and applied on top enhances richness and helps crust browning via Maillard reactions. The two-step rise builds structure and flavour by allowing yeast to ferment and develop while controlling gas retention for soft crumb.
Troubleshooting Common Issues
- If the loaf is dense or small: Yeast may have been inactive or proofing conditions too cool—warm your kitchen or check yeast freshness.
- If the top is too dark or burning: Tent with foil and reduce oven temperature by 10–15 °F next time.
- If the bread is chewy or under-cooked inside: Increase bake time slightly or check internal temperature before removing.
- If flavour is too subtle: Use more garlic, fresh herbs or add herb butter to finish.
Additional Inspirations
Once you’ve mastered this version, try similar method for other breads: sun-dried tomato and basil brioche braid, cheddar and scallion braid, or cinnamon-raisin braid for sweet mornings. The braiding technique and flavour core are highly adaptable.
Conclusion
Garlic Herb Braided Bread is a show-stopping loaf that brings warmth, aroma and homemade elegance to your table. Whether for a special dinner, family meal or simply baking just because—you’ll enjoy slicing into golden strands filled with garlic, herb and butter goodness.


