| Prep Time: 30 minutes | Cook Time: 35 minutes | Total Time: 4 hours 5 minutes | Serves: 12 |
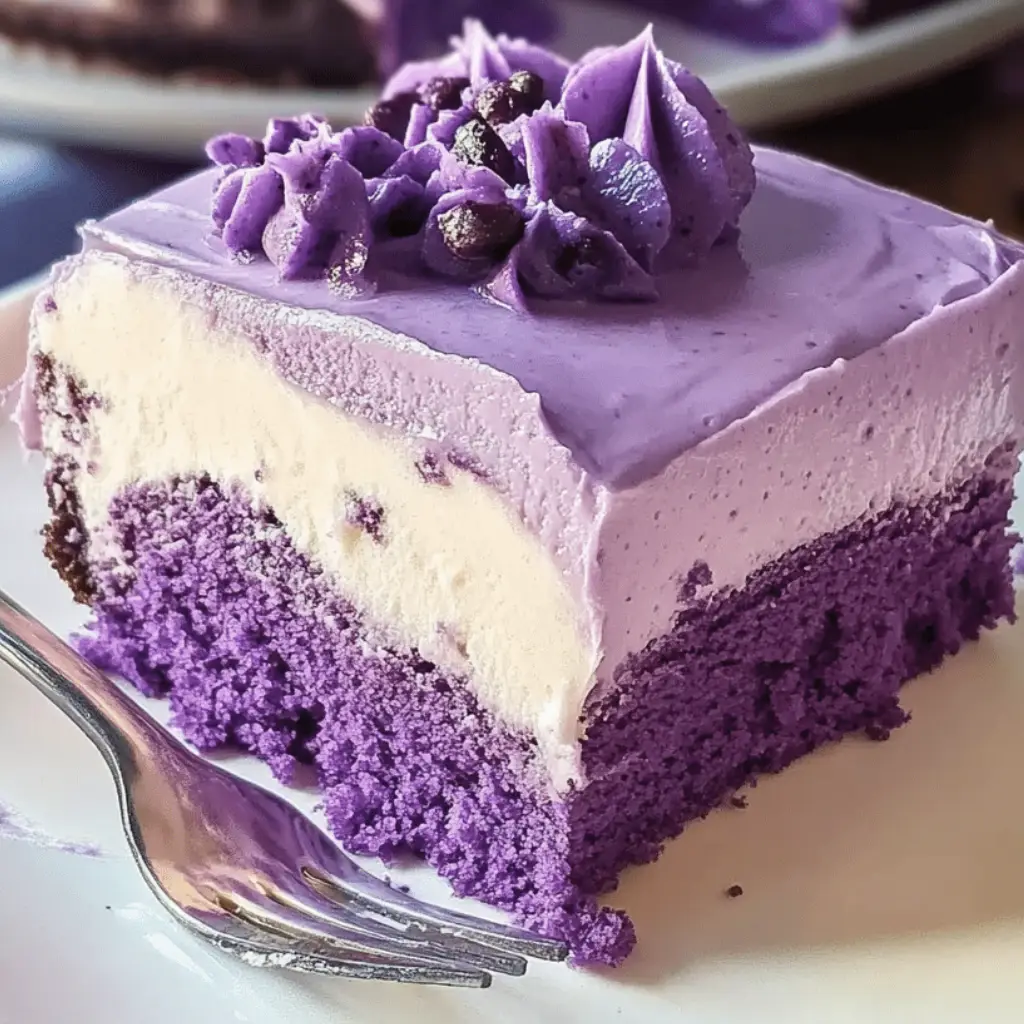
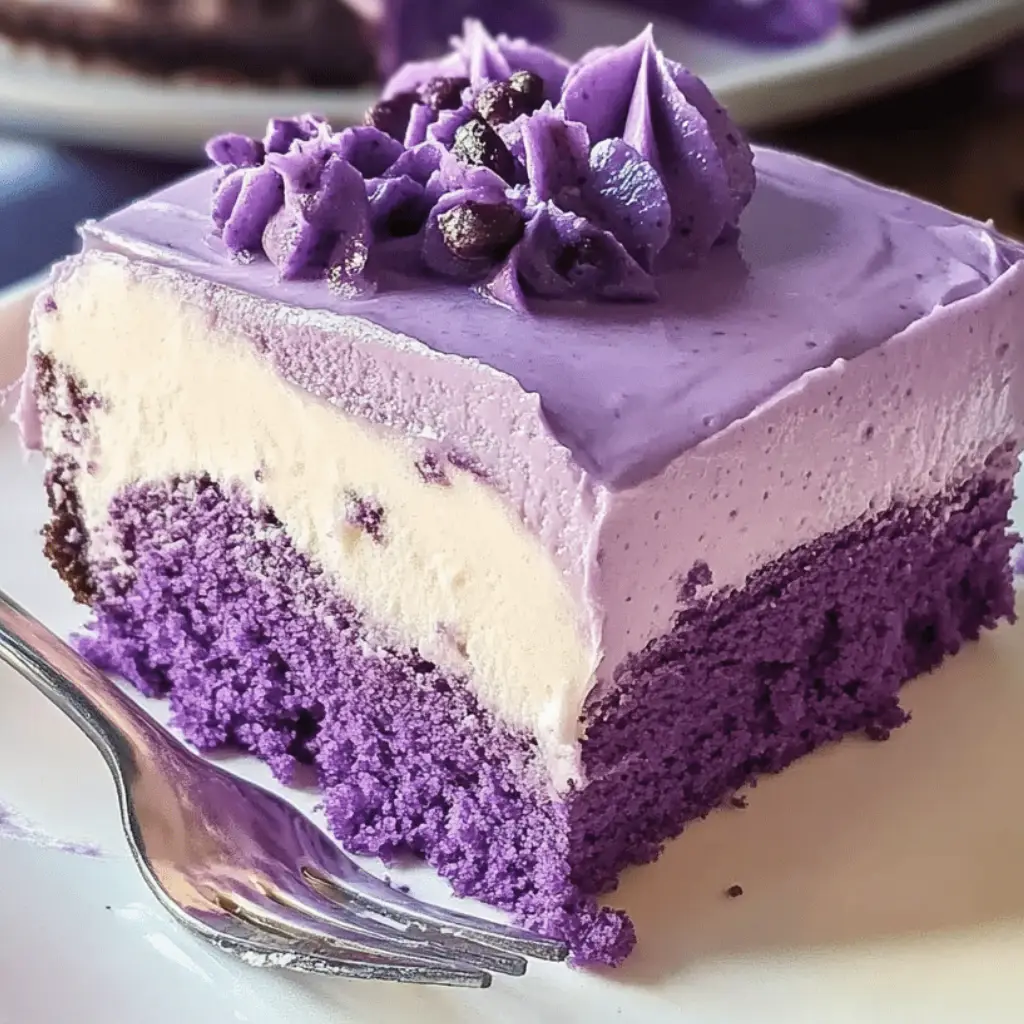
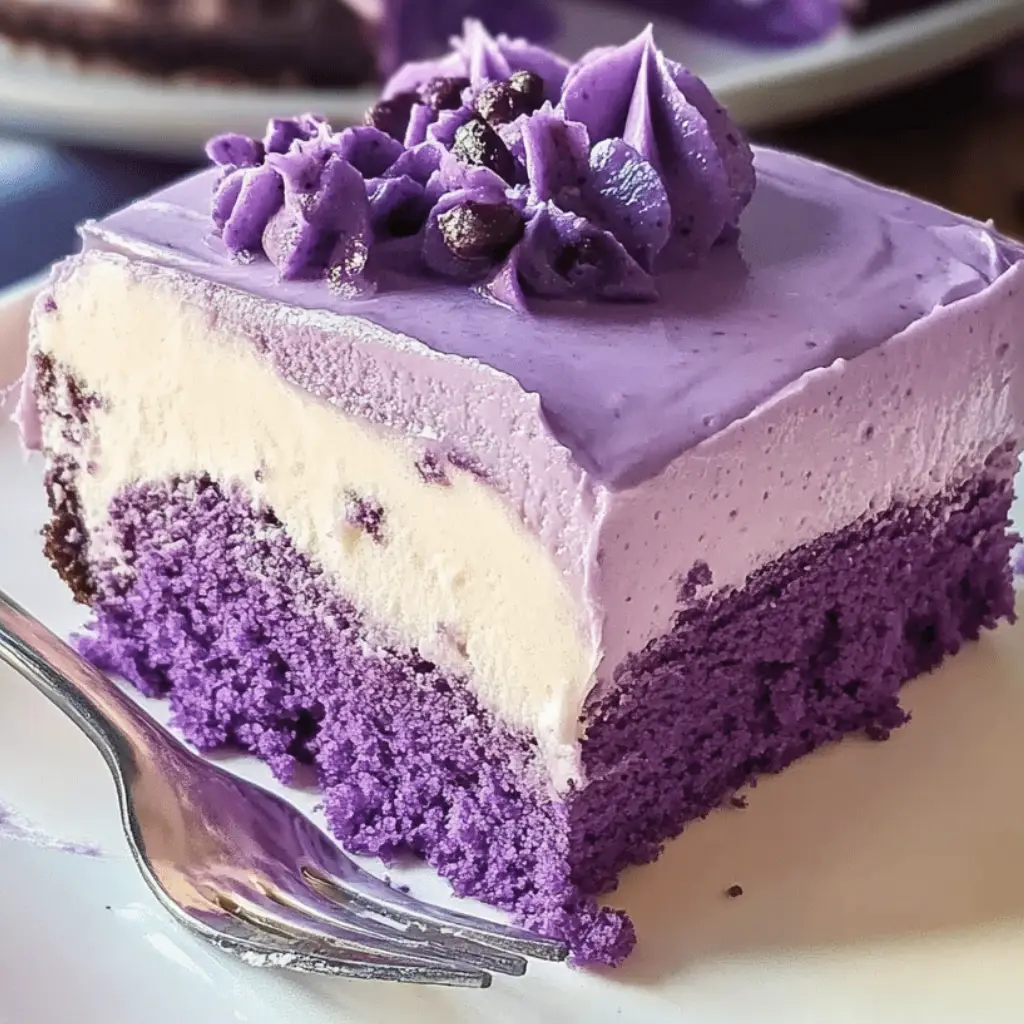
This stunning purple dessert brings together the beloved Latin American tres leches tradition with the distinctive earthy sweetness of Filipino ube, creating a dessert that captivates both the eyes and the palate because the vibrant lavender hue makes every celebration feel more special. The marriage of these two culinary worlds produces a cake that maintains the signature ultra-moist texture of traditional tres leches while introducing the subtle nutty vanilla notes that make ube such a treasured ingredient in Filipino cuisine.
Why This Ube Tres Leches Cake Will Become Your New Favorite
The beauty of this fusion dessert lies in its ability to honor both cultures while creating something entirely new, because when you combine the three-milk soaking technique with ube’s natural sweetness, you achieve a dessert that feels both familiar and exotic. Traditional tres leches already boasts incredible moisture and richness, but the addition of ube brings complexity that elevates every bite because the purple yam’s earthy undertones balance perfectly against the sweetness of the milk mixture.
What makes this version particularly special is how the coconut milk replaces heavy cream in the soaking mixture, creating a tropical undertone that complements the ube beautifully because coconut and ube are natural flavor companions in Filipino dessert traditions. The result is a cake that feels lighter than traditional tres leches while maintaining that signature melt-in-your-mouth texture that makes people come back for seconds.
Essential Ingredients for Perfect Results
For the Sponge Cake:
- 6 large eggs, separated
- 1 cup granulated sugar, divided
- 1 1/3 cups all-purpose flour
- 1 teaspoon baking powder
- 1/2 teaspoon salt
- 1/3 cup whole milk
- 2 teaspoons ube extract
- 1 teaspoon vanilla extract
- 2 tablespoons ube halaya (purple yam jam)
For the Three-Milk Mixture:
- 1 can (14 ounces) sweetened condensed milk
- 1 can (13.5 ounces) coconut milk
- 1 cup whole milk
- 1 teaspoon ube extract
- Purple food coloring (optional)
For the Whipped Topping:
- 2 cups heavy whipping cream
- 1/3 cup powdered sugar
- 1/2 teaspoon ube extract
- Purple food coloring (optional)
The Art of Creating This Filipino-Latin Fusion
Creating the perfect ube tres leches requires understanding both the science of chiffon cake making and the patience needed for proper milk absorption, because rushing either process will compromise the final texture. The key to success lies in achieving the right balance between the cake’s structure and its ability to absorb the milk mixture without becoming soggy, which requires careful attention to mixing techniques and timing.
The ube component adds complexity because unlike artificial flavoring, real ube brings natural starches that can affect the cake’s texture if not properly incorporated. This is why the recipe calls for both ube extract and ube halaya, because the extract provides flavor intensity while the halaya contributes authentic texture and color depth that cannot be replicated with artificial ingredients alone.
Step-by-Step Instructions for Success
Preparing Your Kitchen and Ingredients
Begin by preheating your oven to 350°F and buttering a 9×13-inch baking dish thoroughly, because proper preparation prevents sticking and ensures even baking. Allow all eggs to reach room temperature for at least thirty minutes before starting, because room temperature eggs separate more easily and whip to greater volume than cold eggs straight from the refrigerator.
Set up three large mixing bowls before beginning, because this recipe moves quickly once you start and having everything ready prevents deflation of your whipped egg whites. In one bowl, sift together the flour, baking powder, and salt, creating a well in the center for easy incorporation later.
Professional Tip: Use a kitchen scale for measuring flour if available, because accurate flour measurement is crucial for achieving the proper cake structure that can support the milk absorption without becoming dense.
Key Points: Room temperature ingredients combine more easily, proper mise en place prevents mistakes, and accurate measurements ensure consistent results every time you make this recipe.
Creating the Perfect Sponge Base
Separate your eggs carefully, ensuring no yolk contaminates the whites because even a small amount of fat will prevent proper whipping. Add 3/4 cup sugar to the egg yolks and beat with an electric mixer on high speed until the mixture becomes pale yellow and fluffy, approximately three to four minutes of constant beating.
Whisk the ube halaya, ube extract, vanilla extract, and milk into the yolk mixture until smooth, though small lumps of ube halaya are perfectly acceptable because they add texture to the finished cake. The mixture should be well combined but not overworked, because excessive mixing can develop gluten and create a tough texture.
Professional Tip: If your ube halaya seems too thick, warm it slightly in the microwave for fifteen seconds to make it easier to incorporate into the liquid ingredients.
Key Points: Properly whipped yolks create structure, careful incorporation maintains texture, and ube halaya lumps add pleasant bursts of flavor throughout the cake.
Achieving Perfect Meringue
Clean your mixing bowl and beaters thoroughly with white vinegar to remove any fat residue, because even trace amounts of oil can prevent egg whites from whipping properly. Beat the egg whites on high speed until soft peaks form, then gradually add the remaining 1/4 cup sugar while continuing to beat until stiff, glossy peaks form.
The meringue is ready when peaks hold their shape firmly but still look moist, because over-whipped whites become grainy and difficult to fold into the batter. This process typically takes three to five minutes with a stand mixer or slightly longer with a hand mixer.
Professional Tip: Test your meringue by turning the bowl upside down; properly whipped whites should stay in place without sliding or falling out.
Key Points: Clean equipment ensures proper whipping, gradual sugar addition creates stability, and proper peak formation indicates readiness for folding.
Combining Components Without Deflation
Pour the yolk mixture over the flour mixture and use a large spatula to gently combine them, working just until no dry flour remains visible because overmixing develops gluten and creates density. Add one-third of the meringue to the batter and fold gently to lighten the mixture, making it easier to incorporate the remaining whites without deflation.
Add the remaining meringue in two additions, folding carefully with a cutting and turning motion because this technique preserves the air bubbles that create the cake’s light texture. Work quickly but gently, stopping as soon as the mixture appears homogeneous because additional mixing only deflates the carefully created structure.
Professional Tip: Use a large rubber spatula and cut down through the center of the batter, scrape across the bottom, and fold up and over the top, rotating the bowl quarter-turns as you work.
Key Points: Gentle folding preserves air bubbles, working in stages prevents deflation, and stopping when combined maintains optimal texture.
Baking to Golden Perfection
Pour the batter into your prepared pan and gently tap the pan on the counter to release large air bubbles, because trapped air pockets can create uneven texture in the finished cake. Bake for 30 to 35 minutes, or until the cake springs back when lightly touched and a toothpick inserted in the center comes out clean.
Allow the cake to cool in the pan for fifteen minutes before proceeding with the milk mixture, because hot cake can curdle the dairy products and create an unpleasant texture. The cake should feel firm but still warm when you begin the soaking process.
Professional Tip: Use a ceramic or glass baking dish rather than metal, because these materials conduct heat more evenly and make serving easier later.
Key Points: Proper baking creates structure for milk absorption, cooling prevents curdling, and timing affects final texture significantly.
Creating the Perfect Milk Mixture
While the cake cools, whisk together the condensed milk, coconut milk, whole milk, and ube extract until completely smooth, because any lumps will create uneven soaking patterns in the finished dessert. Add purple food coloring if desired, mixing until you achieve your preferred shade of lavender.
The mixture should be well combined and flow easily when poured, because proper consistency ensures even distribution throughout the cake. Taste and adjust the ube flavoring if needed, keeping in mind that the flavor will mellow slightly once absorbed into the cake.
Professional Tip: Strain the milk mixture through a fine-mesh sieve if you notice any lumps, because smooth liquid creates the most even absorption pattern.
Key Points: Smooth mixture ensures even soaking, proper flavoring balance is crucial, and consistency affects absorption quality.
The Crucial Soaking Process
Using a fork or wooden skewer, poke holes all over the surface of the warm cake, making them about half an inch apart and pushing all the way to the bottom because thorough perforation is essential for proper milk absorption. Pour the milk mixture slowly and evenly over the entire surface, watching as it disappears into the holes you created.
Allow the cake to absorb the first addition completely before adding more liquid, because rushing this process can create pooling and uneven soaking. Continue adding milk mixture gradually until it has all been absorbed, which typically takes fifteen to twenty minutes of patient application.
Professional Tip: If milk begins pooling on the surface, poke additional holes in those areas to encourage absorption, because even soaking creates the best texture.
Key Points: Thorough perforation enables absorption, gradual addition prevents pooling, and patience ensures even distribution throughout.
Professional Tips for Outstanding Results
Temperature control plays a crucial role in this recipe’s success, because both the cake and milk mixture need to be at optimal temperatures for proper absorption without curdling. The cake should be warm but not hot when you begin soaking, while the milk mixture can be at room temperature or slightly cool.
Timing your preparation stages correctly ensures that each component is ready when needed, because this recipe requires coordination between multiple elements. Start your milk mixture preparation while the cake bakes, and have your whipped cream ready to apply as soon as the soaking process is complete.
Understanding your oven’s characteristics helps achieve consistent results, because baking times can vary significantly between different appliances. Use visual and tactile cues rather than relying solely on timer settings, and always check for doneness with the toothpick test before removing from the oven.
Creative Variations to Try
Transform this recipe into individual servings by baking the cake in muffin tins and reducing the baking time to eighteen to twenty minutes, because personal portions make elegant presentations for dinner parties. Adjust the milk mixture proportionally and soak each cake individually for consistent results.
Create a layered version by baking two thinner cakes and alternating cake and soaked layers with whipped cream, because this approach allows for more dramatic presentation while maintaining the classic flavor profile. Cut each layer horizontally and build up your masterpiece with careful attention to even distribution.
Experiment with complementary flavors like coconut flakes toasted until golden, fresh mango slices, or candied purple yam pieces as garnishes, because these additions enhance the Filipino flavor profile while adding textural interest. Consider incorporating these elements both within the cake layers and as decorative toppings.
For those seeking more tropical notes, try adding a tablespoon of coconut cream to the whipped topping, because this enhancement deepens the coconut flavor connection while maintaining the dessert’s overall balance. You might also consider a light dusting of toasted coconut flakes over the finished product.
Perfect Pairing Ideas
This rich dessert pairs beautifully with strong coffee or espresso, because the bitter notes balance the sweetness while complementing the ube’s earthiness. Consider serving alongside traditional Filipino coffee preparations like kapeng barako for an authentic cultural experience that honors both elements of this fusion dessert.
Fresh tropical fruits make excellent accompaniments, particularly those that echo the dessert’s Filipino heritage like fresh mango slices, lychee, or rambutan because these fruits provide bright acidity that cuts through the richness. For more extensive dessert spreads, consider including items from savory sides to balance the sweetness.
Light appetizers or palate cleansers work well before serving this dessert, because its richness benefits from contrast with lighter flavors. Consider options from snacks and appetizers that won’t compete with the cake’s distinctive flavor profile.
Discover More Delicious Combinations
Expand your dessert repertoire with complementary recipes that share similar flavor profiles or preparation techniques, because building a repertoire of related dishes helps develop your skills and understanding of these ingredients. Consider exploring dessert recipes that feature tropical flavors or milk-based preparations.
Perfect your beverage pairings by exploring refreshing beverages that complement rich desserts, because the right drink can enhance the entire dining experience. Think about contrasting temperatures and flavors that cleanse the palate between bites.
Build complete meal experiences by incorporating dishes that prepare guests for this rich finale, including options from breakfast favorites for brunch occasions where this dessert might serve as a stunning centerpiece.
Proper Storage for Maximum Enjoyment
Store your finished ube tres leches cake covered in the refrigerator for up to five days, because the milk-soaked nature requires constant refrigeration to maintain food safety and optimal texture. The cake actually improves over the first day as flavors meld and the texture settles into perfect consistency.
Cover the cake tightly with plastic wrap or store in an airtight container, because exposure to air can create surface drying and absorb refrigerator odors that compromise the delicate flavor balance. If serving at a party, keep the cake chilled until just before serving time.
Individual portions can be wrapped and frozen for up to one month, though the texture changes slightly upon thawing because ice crystals affect the milk-soaked structure. Allow frozen portions to thaw completely in the refrigerator before serving for best results.
The Science Behind the Perfect Texture
The success of tres leches cake relies on creating a sponge structure with enough stability to hold liquid while maintaining tenderness, because this balance requires precise ratios of flour, eggs, and leavening agents. The separated egg technique creates maximum lift while keeping the crumb structure open enough for milk absorption.
Ube’s natural starches interact with the cake’s proteins differently than simple flavorings, because these complex carbohydrates can affect gluten development and final texture if not properly balanced. This is why the recipe carefully controls both the amount and form of ube used in each component.
The three-milk combination works because each dairy product contributes different properties: condensed milk provides sweetness and body, coconut milk adds richness and tropical flavor, while whole milk creates the proper consistency for even absorption. Understanding these roles helps you make successful substitutions if needed.
Troubleshooting Common Issues
If your cake becomes too dense, check your mixing technique and ingredient temperatures, because overmixing develops gluten while cold ingredients don’t combine properly. Room temperature eggs whip better and cold milk can shock the batter, affecting final texture significantly.
Uneven milk absorption usually results from insufficient perforation or rushing the soaking process, because proper hole-making and patient application ensure even distribution throughout the cake. Take time to create thorough perforation patterns and add milk gradually for best results.
Curdled whipped cream often occurs from overbeating or temperature issues, because dairy products are sensitive to both mechanical action and heat. Keep ingredients cold and stop beating as soon as proper peaks form to avoid this common problem.
Additional Inspiration for Your Baking Journey
Explore more Filipino-inspired desserts that showcase ube’s versatility, because understanding this ingredient’s potential opens doors to countless creative possibilities. Consider trying ube ice cream, ube cookies, or ube bread as natural progressions from this cake recipe.
Investigate other tres leches variations from different Latin American countries, because each region has developed unique approaches to this beloved dessert that can inspire your own creative interpretations. Understanding these traditions enriches your appreciation for the technique.
Build your skills with related milk-based desserts like flan, panna cotta, or rice pudding, because these preparations share similar techniques and flavor development principles that reinforce your understanding of dairy-based desserts. Consider exploring perfect sides that complement these rich desserts.
For morning variations of rich desserts, explore breakfast recipes that might incorporate similar flavor profiles in lighter preparations suitable for earlier in the day.
Consider dinner recipes that would pair well with this dessert as a meal finale, because understanding the complete dining experience helps create memorable occasions.
Finally, balance rich desserts with lighter options from salads that could serve as palate cleansers or earlier course options in extended meal presentations.
Conclusion
This ube tres leches cake represents the beautiful possibilities that emerge when culinary traditions meet and merge, creating something that honors both heritages while standing uniquely on its own merits. The process may require patience and attention to detail, but the results justify every moment spent perfecting the technique because few desserts can match the visual impact and flavor complexity of this stunning purple creation.
Whether you’re introducing friends to Filipino flavors or adding tropical flair to a Latin American favorite, this recipe provides a foundation for countless memorable occasions because its unique appearance and exceptional taste make it a conversation starter that brings people together. The combination of familiar tres leches comfort with exotic ube intrigue creates a dessert that satisfies both adventurous palates and those seeking something special yet approachable.
Master this recipe and you’ll have a showstopper dessert that works equally well for intimate family gatherings and large celebrations, because its make-ahead nature and stunning presentation solve multiple entertaining challenges while delivering flavors that linger in memory long after the last bite disappears.

